The Following are a set of Pics recently taken of a project I just finished . I found a Bowl Back Mandolin on Ebay for $ 16.00 and decided what the heck . Never Having tried Luthier Work this is my first attempt. I tried very hard to keep it Original.
What I found was as follows :

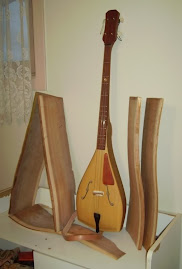
You can see its Quite Filthy And Old , Figure as best as I can Tell its 1920's -30's era .

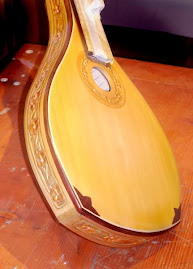
If you look close you can see the Neck Is Broke off the bowl at the heel of the neck . Looks like a small crack and around the sound hole by the finger board its caved in almost 1/2" look
closely and you can see the strings are quite high over the Fingerboard / Frets.

This Pic Shows the break in the neck better , The crack is Quite
visable in this one.
I had to remove the neck from the unit and do so without breaking the Fingerboard , sadly wasn't so successful . The Board Broke into about 8 pieces so I had to re glue it together like a jigsaw puzzle and was successful at that.
The neck was attached to the body with a dowel
originally, and it had bent and broke . I set up my lathe and made a new Hard Maple
Dowel and
re glued it in the neck and cleaned out the area in the bowl area to
receive the dowel as well.

As you can see I have clamped a block of Hard Maple
into the face side of the bowl as a
cleat to flatten it out and bring that 1/2" of " Caved in " Area Back out so the strings will be at right height for playing.

After everything was finished
gluing I still had approx 1/6" inch of drop in the body at the sound hole. So to solve the problem I cut a small spacer and glued it to the body and sanded it to the proper height and that allowed me to glue the neck and finger board back in place and get it at the correct height . I KNOW A PROFFESSIONAL RESTORER is gonna read that a freak , but as I said
I'm new at this and did best I could.
I purchased a Product
that's called restorers polish that has no silicone in it and used that along with a couple hours elbow grease and rags to get it cleaned up and still retain the "old" look as it should have. As you will see its quite good at what its designed for.
So You Have Seen My Project From The Start , My Next Post will be the Finished Pics of The project . Thanks For stopping By.


 If you look close you can see the Neck Is Broke off the bowl at the heel of the neck . Looks like a small crack and around the sound hole by the finger board its caved in almost 1/2" look


 Opening The Doors You See The Dart Board Mounted To Cork That Has Been Glued To The Plywood Backing . The Sides Of The Cabinet Are Oak And It Is Approx 3" Deep . Because Of The Ceiling Height In The Basement I Was Forced To Mount The Dartboard Higher In The Cabinet To Make The regulation Height And Still Get It Wall Mounted.
 As You Can See The Unit Is Lagged Into The Basement Wall With Large Bolts Since We Have Concrete Walls That Was Necessary . The Top Of The Cabinet Is 1-1/2" Below Ceiling Level , Which I Was Afraid Would Cause Problems in Shooting . However It Seems To Be Fine.

