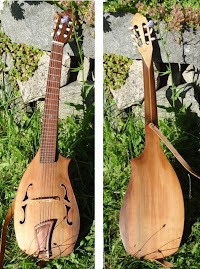
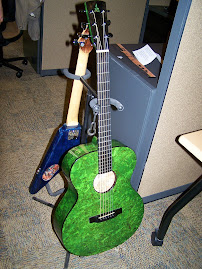
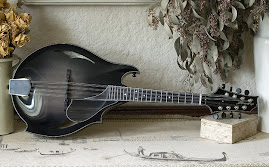
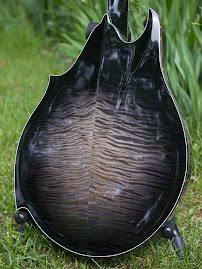
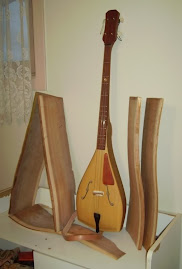
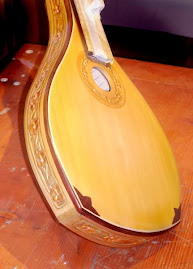
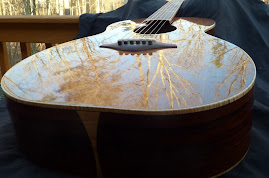
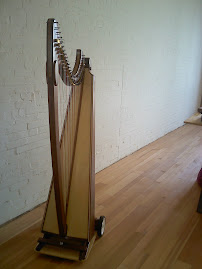
Over at the Official Luthiers Forum http://www.luthiersforum.com/ We have started a Build Challenge for Builders who are Members from around the globe .
If you are not Familiar with the site I recommend that you stop by there . You will find allot of great looking Guitars and find some very friendly people .
This Challenge goes as Follows :
( 1 ) Any stringed instrument you wish to build .
( 2 ) $150.00 Maximum cost , or comparable cost to the land in which you reside " see Spirit of Challenge comment ". To include Wood , Hardware , and Finish IE : Laq , tru-oil , etc:
DO NOT count tools , Molds , glue , tape , sandpaper , cases etc: Materials on hand should be given an
honest value . See Spirit of challenge comment .
( 3 ) Woods must be Indigenous to your region " within reason " See spirit of challenge comment .
( 4 ) No CITIES Materials
( 5 ) Must be Participating OLF member and throw your hat in the ring prior to end of Jan 2012
( 6 ) Finished for judging by end Of may 2012 , allows for 1 month of judging to take place in June .
( 7 ) Pics and utube sound clip for judging .
( 8 ) Judging will be done by OLF public vote and the one with most votes at the end of June wins
( 9 ) This is about FUN and CREATIVITY , so lets not get bogged down in petty stuff . Police yourselves and
Keep in mind the SPIRIT of the Challenge .
START BUILDING AS OF JAN 1ST 2012 , AS OF THE LAND IN WHICH YOU RESIDE
It should be an interesting time , there are a good number of builders involved . Stop by often and check up on the Build Challenge progress !
Friday, December 30, 2011
Monday, December 5, 2011
Electric Build
While I was waiting on some parts to come in for a couple of the guitars I am working on ( hardware stuff) I decided to do some basic work on the electric I have been thinking about .
The body is Mahogany and the neck is Maple . I have added a "heel" at the body joint to give it a different look . The design is for a Strato-caster

The front is partially milled at this point , It will have Humbucker pickups and a black pick guard . A Inset Plug and electronics pockets yet to be routered in.

I have A friend in the luthier world who does custom inlays for people and he made this head plate for me along with several others . His name is Stephen Ziegenfuss and can be reached at www.ziegenfussguitars.com


The body is Mahogany and the neck is Maple . I have added a "heel" at the body joint to give it a different look . The design is for a Strato-caster

The front is partially milled at this point , It will have Humbucker pickups and a black pick guard . A Inset Plug and electronics pockets yet to be routered in.

I have A friend in the luthier world who does custom inlays for people and he made this head plate for me along with several others . His name is Stephen Ziegenfuss and can be reached at www.ziegenfussguitars.com


Thanks for stopping by my little shop and having a look
Thursday, November 24, 2011
More Of " Tool Cane " Series
Hello again . I got to thinking about this and decided , Whats the good of a Hammer if a man doesn't have a Nail to use it on ? Sooooooooooo Instead of making a plain dowel I turned a piece that is " Supposed " to resemble a nail .

Turned it out of Maple as well , a cut off from the orig. piece .


Turned it out of Maple as well , a cut off from the orig. piece .

Fitting the tip and getting a close dimension of the drilled hole .
 I decided to just use Lemon oil wipe on finish , easier for the user to refinish if needed .
 Look anything like a nail at the end of the Hammer ?

Thanks for stopping by and enjoying my little Passion .
 I decided to just use Lemon oil wipe on finish , easier for the user to refinish if needed .
 Look anything like a nail at the end of the Hammer ?
Thanks for stopping by and enjoying my little Passion .
Wednesday, November 23, 2011
Walking Cane Series
The Third Build in my Walking Cane Series . I have a friend that has recently been using a cane allot , so I decided to take a break from luthery to make him a cane . He was a Carpenter most of his Life So I thought a 24oz Framing hammer was appropriate . The head was formed to allow for proper hand size and the proportions based on that .


I then started the handle , I had intentioned at first to make it full length but the proportions did not look right . I cut the handle down to the proper size and it will have a 1" maple dowel coming out of the bottom of the handle with a rubber cane tip applied .

The Square at the base of the handle will be remover after its drilled for the Dowel.

 Tried to make the transition into the head look as close to the old style Maple / Hickory handles

Thanks for stopping by . Have a great day .


I then started the handle , I had intentioned at first to make it full length but the proportions did not look right . I cut the handle down to the proper size and it will have a 1" maple dowel coming out of the bottom of the handle with a rubber cane tip applied .

The Square at the base of the handle will be remover after its drilled for the Dowel.

 Tried to make the transition into the head look as close to the old style Maple / Hickory handles
Thanks for stopping by . Have a great day .
Tuesday, October 18, 2011
Cocobolo Build Started
While I wait on Items to come in from LMI and StewMac , I started a Cocobolo Build . Working on back and sides now . Kerfing in place and Bracing for the back


Wednesday, October 5, 2011
New Purple Heart Pics
Working on getting the Purple heart to the point I can string it up and listen to the tone before I finish it with Laq.


With the headstock I was trying to capture the " Arrow Head " Idea. The head stock being angled and the " Indian Arrow Head " Purple heart center .


I have used a Jig here from StewMac to locate the bridge and used dowels to pin it through the string pin holes for gluing . The Jig locates the bridge in relation to the nut / 12Th fret so you have the proper distance bridge to nut .


With the headstock I was trying to capture the " Arrow Head " Idea. The head stock being angled and the " Indian Arrow Head " Purple heart center .


Thanks For stopping by . Hope you enjoyed your Tour through my Hobby !
Wednesday, September 14, 2011
More Purple Heart Guitar Pics
I have mounted the 1 Piece Mahogany Neck that I cut out to the body this week . Its bolted inside to hold it in place while the glue dries .
 Another shot showing the fit from the side . I will install the truss rod and fretboard later this week.

Thanks for stopping by and enjoying my Little passion .
 Another shot showing the fit from the side . I will install the truss rod and fretboard later this week.
Thanks for stopping by and enjoying my Little passion .
Friday, August 12, 2011
Tru Oil Padauk Finish
At this point we are about 5 coats of " TRU OIL" into the finish of the back and sides . As you can see it shines quite nicely . It does take longer to finish this way and the Wood prep is way more important . The Tru Oil finish does not hide scratches or blemishes in the wood .


I do think I will use this technique again , I like the way it goes on and looks finished .
Thanks for stopping by.
Thursday, August 11, 2011
Finish on Pudauk Build
I have decided to try the TRU OIL finish on the Padauk Build . I have applied 3 coats of sealer /filler sanded and am starting the Coats of True Oil now . this is a much slower process than Laq. I am hoping I like it , looking good so far .
 You can see th diffrence of raw wood and Tru Oil in the pic at the neck

 You can see th diffrence of raw wood and Tru Oil in the pic at the neck

Monday, August 1, 2011
Spent a portion of last night putting in markers on a fret board . I wanted to for something a little different . Since the Guitar is Purple heart I decided to make Square Purple heart inlays . First time Ive ever tried this and hopefully I will get better with time . LOL


Thanks for stopping by , Hope you enjoyed your visit . Stall cool out there.
Friday, July 29, 2011
Little more work on the Purple Heart Guitar Build . I have been fitting the neck Tenon joint to the guitar body . I am very close at this point . Some minor adjustment and we will have a good fit.
 The Picture above shows the finish pencil line marks for the fretboard , the tension rod slot and carbon fibre filler stiffeners.
 A Little better picture showing the shape of the headstock . Taken from an Arrow Idea.
 Couple of pics showing the fit at the body . This is very time consuming .

Thanks for stopping by , Have a wonderful week and stay cool out there !
 The Picture above shows the finish pencil line marks for the fretboard , the tension rod slot and carbon fibre filler stiffeners.
 A Little better picture showing the shape of the headstock . Taken from an Arrow Idea.
 Couple of pics showing the fit at the body . This is very time consuming .
Thanks for stopping by , Have a wonderful week and stay cool out there !
Wednesday, July 20, 2011
I have been shaping the neck for the Purple Heart Guitar . It is made from one piece Mahogany and is stiffened with Carbon Fibre rods . This is a 12th fret fit to the body and will have a 1-3/4" nut width . I have fashioned the heel to the shape I have used on all my mando's and if you notice the Headstock has a "Arrow" shape . Not sure how its gonna work , I think OK , at least it looks different .

You can tell better from the picture below that the head stock actual has an angle where the tuners are and is bowled out in back.


You can tell better from the picture below that the head stock actual has an angle where the tuners are and is bowled out in back.


The Picture below really shows the " Arrow" angle that I was shooting for .

I hope you enjoyed your short look through my wood shop . Thanks for stopping by.

I hope you enjoyed your short look through my wood shop . Thanks for stopping by.
Have a great day.
Thursday, July 7, 2011
Oscar Schmidtt , Not oscar the grouch !
Found this old Oscar Schmidtt AutoHarp at an antique store recently . It was in bad shape . Paid $35.00 for it and thought it was to much then . The back was falling off , the end pin bar was about pulled out ( where the strings attach on those lil pins ) and the bracing was all lose and warped. I didn't take pics of start , wish I had when I realize how well it turned out .
 Picture from tuner end , they all appear orig.
 Picture of end bar reglued in place and all the strings back on pins . Talk about a little pain in the butt to string .

4 hrs later , a bit of Hyde glue ( that's what was used originally ) and some preservation polish to clean it and still keep the patina , and there you have it . I didn't try and tune it those strings are old . I just tightened them slightly taut and let it go . Cant be played that way , but will look real nice as House decoration .
Thanks for stopping by .
 Picture from tuner end , they all appear orig.
 Picture of end bar reglued in place and all the strings back on pins . Talk about a little pain in the butt to string .
4 hrs later , a bit of Hyde glue ( that's what was used originally ) and some preservation polish to clean it and still keep the patina , and there you have it . I didn't try and tune it those strings are old . I just tightened them slightly taut and let it go . Cant be played that way , but will look real nice as House decoration .
Thanks for stopping by .
Subscribe to:
Posts (Atom)


