( thank god for pain killers and brandy )
Anyway . In true Wudwerkr Fashion , I don't buy it if 'n I can build it So I made what I needed to get me Through the weeks till its all better .
 Yep , its a walking cane . Wifee says my brain power should be put ta better use LOLOL
Don't worry I gonna be OK , just hobblin around for a bit .


 Pained circle above , Top cracked in a dozen places and not repairable . Has to be replaced.
 The
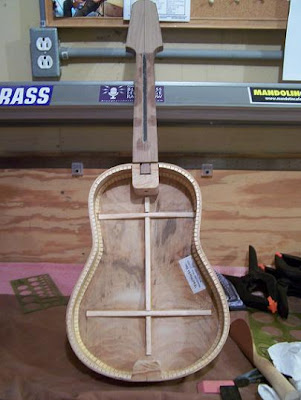
The  The Pic above shows the "reinforcing I glued in to help
  The neck was warped and in bad shape , I sanded it down and used a hand plane to try and straighten the fret board side , it was "partially"
  The back and sides after I sanded and filled cracks and
  The above is the new top , I made it out
  The bracing has been glued in and the "F" holes redone to match the
  View from the

 After staining , during the
  The back of the finished product , Black stain in the wood grain and Cherry stain over that. You can see how the black Painted neck ties in nicely now.
 The front of the finished Guitar . The Top is black stained walnut and the fingerboard is Cherry stained . So the whole effect turned out well.